


Guten Tag! Germany is definitely feeling Fall-ish (more like a California winter) this past week.... I must say, I am making the best of it with hearty stews, homemade bread and crumb cake, walks through the woods, cozy coffee dates with friends, farmers' markets and lots of candle-lit movie nights. I am super thrilled, because my home is pretty much done. Before I can do the room reveals though, I am going to show you project by project how we completed our home in the most frugal way possible. Getting to explore the world and trying new things is our top financial priority at the moment.
Today, I am going to show you how I simply re-upholstered our kitchen chairs. This table and chair set was a hand-me-down of a hand-me-down of a hand-me-down. I love free! The chairs used to have awful green, plaid, stained seats that I recovered a few years ago in an even more awful zebra print. Heck, that was when I was in my sassy, bachelorette days.


I couldn't find a fabric that I liked in my price range, so, I decided to make my own. I stumbled across a GIANT piece of fabric that my grandma gave me a few years ago. I am pretty sure it was an old table cloth...regardless, it's a heavy duty fabric that is PERFECT for seat cushions. I mixed some of this "FABRIC MEDIUM" that I found out about from the awesome blog View Along The Way. Check out her gorgeous painted, striped curtains.


I actually just mixed this with extra wall paint that I had.
I got a giant foam stamp for 10 euro from the German craft store. I stamped away on my large piece of fabric. I wanted the "look" to be hand painted and imperfect...and welp, that's what I got...ahh ha! Once your paint dries...

You are going to want to lay your cushions (also face down) on your fabric. Cut around your cushions leaving an extra 2-3 inches of fabric for wrapping and stapling.
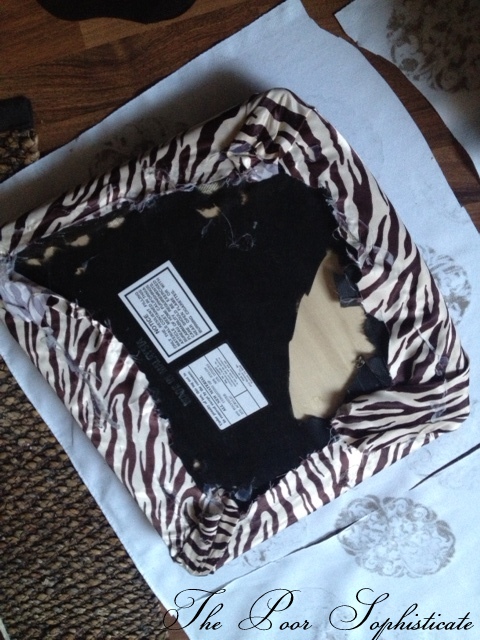
In the above picture, check out my majestic hot gluing skills. That was back when I could only afford a glue gun and some value menu tacos, (like, a month ago!)...seriously though, that glue job lasted quite a few years... I am pretty surprised myself. I removed the zebra fabric so it wouldn't show through the white.

Here is the end product!

I LOVE IT! I want to use this pattern all over my house!

By the way this part of the kitchen used to be this color....

To see more before pictures of the kitchen click here!
We hung our giant cafe-style chalkboard on the wall for our menu! I use it every day! Next to the table is a little red fireplace... it's quite cozy! For under 15 euros, my free dining set got a completely new look!

What projects are you working on?
Until next time,


I love the mix of textures in your space. The chandelier with the rustic wood is just gorgeous and your newly recovered chairs just fit in perfectly.
ReplyDeleteAngela
Thank you Angela! I fancy a good blend of items so I really appreciate that you noticed that detail! Your kind words made my day!
DeleteBlessings!
Absolutely gorgeous! I love the pattern of the chairs. Just perfect!
ReplyDeleteOh Iris! Thank you so much for helping me find that awesome stamp! It is the best! xo
DeleteWow!! I love it!!
ReplyDeleteThank you Kristen!
DeleteStunning! Your whole dining room is just beautiful!
ReplyDeleteThank you Kelly and thank you for the advice! Your blog is my favorite! I hope you have a blessed day!
DeleteGreat job Molly! The chairs look great but even more exciting for me is to see the barn. It is looking fantastic!
ReplyDeleteThank you Ann! How are you liking Japan??
DeleteBeautiful, Molly! Absolutely lovely. Love how you pulled it all together.
ReplyDeleteMary Alice
Thank you Mary Alice! How are you enjoying this Falliday season?
DeleteI love the chairs Molly! I wish my dining room chairs were as easy to makeover.....My husband is in love with his brown microsuede dining room chairs which are not really to my liking at all. I'm still trying to figure out how to convince him we need to change them somehow.....
ReplyDeleteHey there! Maybe get some nice slip covers throw them on and get his opinion? Worst case scenario, you return them for a refund! If he does like them you could always paint them or a portion of them as well! Good luck!
ReplyDeleteI have just found your blog Molly and its fabulous. Just the inspiration to help get my decorating on track during 2013
ReplyDeleteThank you so much Janette! I am so happy you like it! I hope it gives you tons of ideas!! Thank you so much for stopping by! xo
DeleteGreat post. I used to be checking continuously this weblog and I'm inspired!
ReplyDeleteVery useful info particularly the remaining phase :) I deal with such info a
lot. I was looking for this certain info for a very long time.
Thank you and best of luck.
Feel free to surf to my web-site - basal metabolic rate
Be in this setting for another 15 secondsroughly.
ReplyDeleteMy weblog; cydia jailbreak for free
I think the admin of this web site is truly working
ReplyDeletehard in support of his site, as here every material is quality based
information.
Feel free to visit my site chinese interpreter business