Friday, July 27, 2012

Summertime Stove-Top Potpourri


Aloha friends! How are you all doing!? Swell, I hope! Here in Germany it rains almost every, day even though it's summer. Being a California girl, I need a little bit of summer in my life, and this recipe sure helps! 
There aren't a ton of yummy natural candle options in the local area and the Yankee candles available run about $25! Yikes!! I wanted my home to smell delicious without breaking the bank and using up our precious traveling money. The whole point of this blog is to enjoy the beautiful things without dropping a lot of dough, so, I came up with this awesome summery scent!
I grabbed random items in my kitchen and was determined to create a yummy-licious tropical scent that would penetrate my nostrils and make me wanna do the hula! 
We are all familiar with the Christmas Stovetop Potpourri (click here to get that recipe), here is my summertime version!
It smells like a pineapple upside down cake is baking in the oven....yum!
In a saucepan:
-Throw in a few sliced lemons, limes, and oranges
-Add a can or two of pineapple juice
-Drizzle an ounce of coconut extract
-Top it off with a few cups of water and.....
Let it simmer all day long! 
If you aren't a coconut kind of person you could simply do citrus and pineapple! You can add more or less of these ingredients.
Remember to turn the stove off when you leave your home. You can add more liquids as it simmers away. This concoction should last you a few days.
Enjoy!

I hope you all have a blessed day and get your home smelling tropical!


Pin It


Thursday, July 26, 2012

A Little Corner Of Our Dining Room

 Hey, hey, hey! I wanted to share with you another little corner of my dining room! Here lies my beloved wine barrel. I picked this guy up off a street in Napa for $40! They usually run about $100-$200 so this was quite a steal. This barrel makes a perfect extra table/ bar-top for entertaining! 
Check out how I can completely change the look of the area just by simply changing the color of the flowers!
I've placed some flowers I picked from our local flower farm yesterday in some vintage blue mason jars. I've added height and movement to the arrangement by placing one of the jars on a little wooden pedestal. This awesome tribal looking, carved,  pedestal, was picked up at a garage sale for fifty cents!   Score 2 for me!! I like to imagine it was discovered in some Mayan temple and was used to grind herbs or something awesome...  It looks great in a food arrangement at a rustic dinner party spread as well!

Here is another colorful flower shot!
 I have decided to start sharing snap-shots of things that inspire me during my day in my posts. I had to share this next picture of some flowers I picked while going on a walk through my little village. I popped them in my milk glass vase (a flea market find) and I thought they were so cheery looking! They look swell on my tree stump side table.
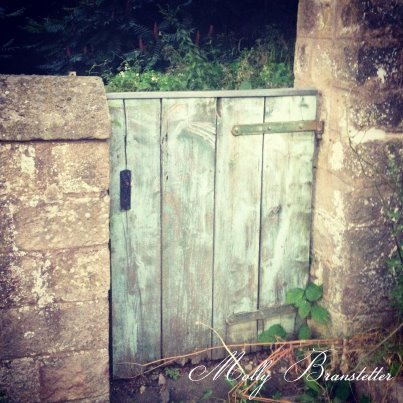
The next picture is of a darling gate I stumbled upon during our evening stroll. Where do you think it might lead to?
Thanks so much for stopping by this little corner of my home (and village)! 

Until next time, 


Wednesday, July 25, 2012

DIY Rosemary Infused Olive Oil

Hello, folks! I hope you are having a lovely day! I am so excited because I have a ton of fun projects to share with you over the next few posts! Today, I had a fantastical day off . We drove through a zillion little villages with the convertible top down, picked flowers, cooked dinner together and attempted a few new projects! Here are a few pictures from the day then, off to the tutorial!

After receiving some delectable, homemade, rosemary infused olive oil for a Christmas gift from my cousins Kara and Matt, I had to re-create it and share a recipe for it! 
Your will need: 
*A bottle of extra virgin olive oil.
*A pretty glass oil bottle (Ikea sells them for cheap and so do most stores like Ross, Marshalls etc).
* 5-6 sprigs of Rosemary per 1 cup of olive oil. I used 3 Cups of oil and 15 sprigs of Rosemary.
I cut Rosemary from my new window-sill herb garden! I highly recommend planting an herb garden. I've planted herbs in my vintage tin canisters, that can be used in a TON of recipes such as Rosemary, Basil, Mint, Sage, Thyme etc. Listen up friends, it's is a huge money saver, and makes you look all fancy pantsy. A whole bush of Rosemary was cheaper for me than a little packet from the grocery store that will rot in a week. 
Heat up the oil and Rosemary sprigs in a pan on medium heat for 5 minutes per cup (you do not want it to boil).
Remove your pan from the heat. Once the oil has cooled down, place the sprigs in your carafe and pour the oil over the sprigs. Rosemary olive oil will last for about a month and should be refrigerated. I've used mine longer and it's just fine. I wrote on my jar with a (insert Jersey accent here) gaaaargis gold pen but you could add a custom label as well!
It's dippy, dippy Mcdipperton time!
To make a delicious bread dip, add a touch of balsamic vinegar, pepper, parmesan cheese and a dash of sea salt, pepper and sugar. Yum, yum, yum! Rosemary olive oil is a must in my kitchen. It's perfect on roasted potatoes and chicken, bruschetta, salads, as a dip or marinade, and it makes a lovely gift! 
Thank you so much Matt and Kara for the inspiration. I will now ALWAYS have fresh Rosemary olive oil on hand!

I hope you all have a wonderful Thursday or whatever day it is for you in your part of the world :)


Creating to: Michael Buble Pandora Radio

Pin It
Linking up to:

Sunday, July 22, 2012

My Recycled Antlers and Dining Room Part 1

Guten Tag! How are ya'll doin'!? I decided I wanted to re-purpose my antlers (the ones I previously used for a jewelry rack) and place them around my "unique" picture that I adore so much! That picture is an awesome multimedia piece that was done by a Polish artist (and purchased at Homegoods. Whoop whoop!). If you didn't know this about me already, I like quirky things in my home. 

So here is what my antlers looked like before. I loved them, but it was time for a change:
Below is a picture of the antlers from Ballard Designs (that cost $50+ a piece). Mine were free, but you can purchase tons of these on Etsy or Ebay all day long for just a couple bucks a pop and paint them yourselves.

I painted my antlers with a basic Krylon white-gloss spray paint to make them look a little more modern. 
I then hammered these little guys into the wall and it finished off that corner of my dining room. 
It's just what the area above our wine cabinet needed.


During the Christmas season, I will switch the picture out for something more festive and these antlers will look great as holiday decor.


I hope you all are having a lovely start to the new week and I look forward to showing you the redo of my upstairs hall. Here is a peak!
Are you working on any antler-related projects?

Until next time...


Pin It
Linking up to:

Saturday, July 21, 2012

Coming Soon to a Blog Near You!


Hey friends! How is your weekend going so far??? As I am sitting in my home blogging, the bells at our local Cathedral are going crazy and are echoing through our cobblestone streets. It is music to my ears! How blessed I am to get to hear this glorious sound everyday!  We have made quite a bit of headway on our home this weekend and I CAN'T wait to show you the finished projects! I have some neat tutorials coming soon! Here is a sneak peak of some of the things I have been working on!


Also, I wanted to share a picture I took this week from the local castle looking down on our village. I just love this view!
Before I sign off to do more projects, I want to give a major, major thank you to Debra from the Bungalow Blog for the sweet feature she did on my blog and home. Thank you so much Debra!!! To see it click here. Be sure to check out all the wonderful projects she has on her blog!

I hope you all are having a fabulous weekend and stay tuned for these new projects, and a few other ones too!


Wednesday, July 18, 2012

Flowers, Our Room and a Reader Showoff!

Hey there! I hope you are all doing so, so well! This has been an INSANE week to say the least. We have taken trips to castles, seen fireworks, made soap, and have been painting and plastering our home.   It's nice to sit down and write for a bit!
One of the things I love so much about Germany is there are a ton of flower farms everywhere you go!  These farms allow you to pick all the flowers you want (many have corn and strawberries too) and there are prices for each type of flower on a sign near a little metal box where you can deposit your cash. If you are living in Germany, be sure to stop if you see a large flower farm, pick a ton of flowers and fill your home with cheery colorful bursts of floral joy at the fraction of the cost of going to a florist. I love all the sunflowers in the background of my picture above. 
On a different note, I wanted to share some gorgeous cake pedestals that a reader made. She did these in a different way than I did mine and I think it's simply brilliant! These gorgeous stands are so well done!
 
To create these beauties, Lynette attached the plates to candlesticks with E6000 which is a dishwasher and microwave safe adhesive. The others were attached with tools and parts ordered off of Etsy and a porcelain and glass bit that can be purchased at any hardware store. 
To see more on making pedestals using vintage or mismatched plates, tea cups, and candlesticks click here.
Thank you so much Lynette for sharing your gorgeous pedestals with us!

I think it's time I start getting to work on making our bedroom nicer, right now it looks pretty gross....seriously. I ripped the ugly border down and all the plaster came down with it....ooops! Here is our bedroom before we make it fabulous!


Are there any big projects you are working on?
I hope you all have a gorgeous day!


Related Posts Plugin for WordPress, Blogger...